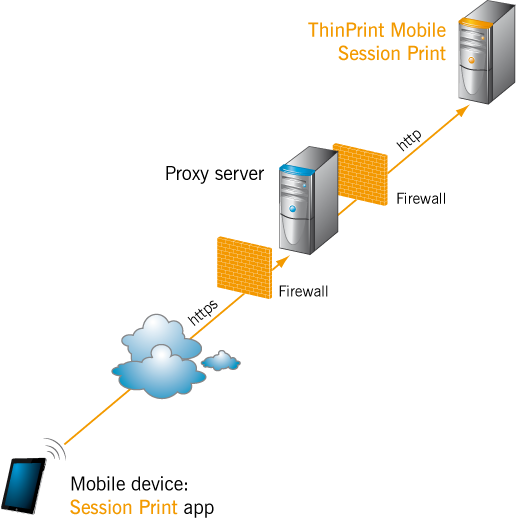
Since the mobile devices connect with Mobile Session Print from outside, you should consider using a proxy server in the DMZ of the corporate network. For this purpose a Web Server (IIS) incl. Application Request Routing (ARR) is required.
Please follow these steps:
Configure IIS and ARR on the proxy server
Proxy
1. Set up a proxy server in the DMZ. A domain membership is not recommended.
2. Install the server role Web Server (IIS) there incl. ASP.NET and Application Development.
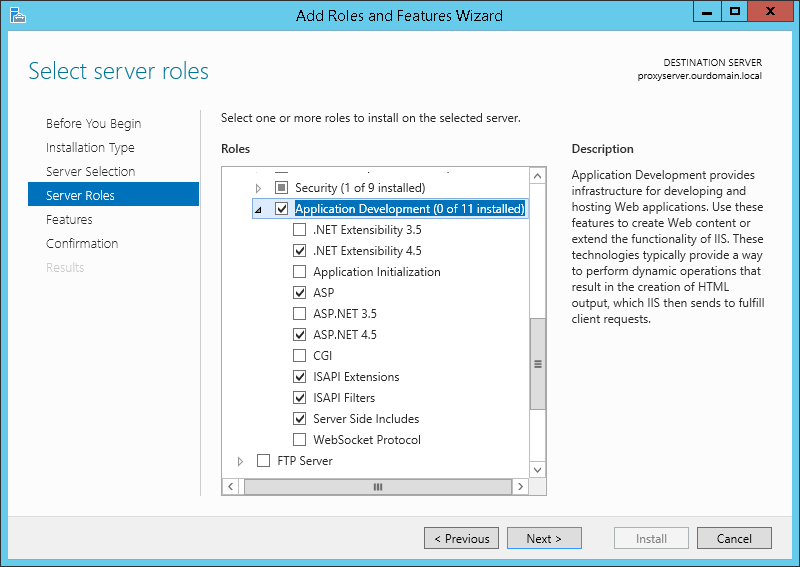
Server Manager: install Web Server (IIS) incl. ASP.NET and Application Development
3. Install the ARR as an add-on for IIS. Download:
www.iis.net/downloads/microsoft/application-request-routing
See also:
https://technet.microsoft.com/en-us/library/dd443526(WS.10).aspx
4. In the IIS Manager, select Application Request Routing Cache.
IIS Manager: select Application Request Routing Cache
5. Then click on Server Proxy Settings.
Application Request Routing Cache: Select Server Proxy Settings
6. Select Enable proxy.
Enabling proxy server
7. Click Apply to save this setting or Yes when you see the relevant prompt.
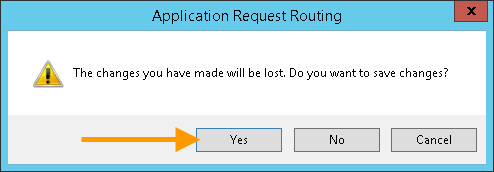
Click Yes to save settings
8. Select Application Request Routing Cache again in the IIS Manager and then select Proxy Setting.
9. Remove the checkmark next to Enable disk cache and again click Apply to save or Yes when you see the prompt.
Disabling disk cache
10. Go to Default Web Site, and then select Bindings.
Default Web Site: select Bindings
11. Add a Binding for https incl. a valid web server certificate. For this, select Add, then the type https. Use the Select button to select the certificate and confirm with OK.
The certificate can be either one you purchased, one generated by your own Certificate Authority, or a self-signed one.
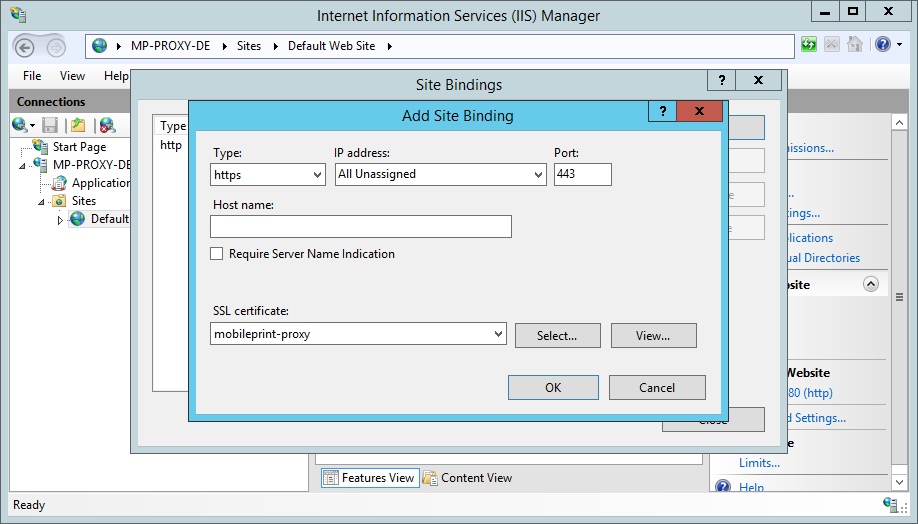
Default Web Site: add Binding for https including certificate
12. If you want to generate a self-signed certificate for this server, select Server Certificates in the home path of the server.
Generating self-signed certificates: select Server Certificates
Server Certificates: select Create Self-Signed Certificate
13. Select SSL Settings in the Default Web Site field.
(SSL means encryption here. This can also be done with the newer TLS.)
Default Web Site: select SSL Settings
14. Enable Require SSL. Click Apply to save this setting or Yes when you see the prompt.
SSL Settings: enable SSL
15. Select URL Rewrite in the Default Web Site field.
Default Web Site: select URL Rewrite
16. Select View Server Variables.
URL Rewrite: select View Server Variables
17. Use Add to add the following variables:
HTTP_X_GW_DMZ_SECRET
HTTP_X_GW_CERT_SUBJECT
HTTP_X_GW_CERT_FLAGS
HTTP_X_GW_CERT_ISSUER
Confirm each one with OK.
URL Rewrite: variables added
18. Select Add Rules and then Reverse Proxy.
Adding rules: select Reverse Proxy
19. Enter the addresses of the Mobile Session Print server and the proxy server, including the TCP port for the Mobile Session Print server (Port 579 for example), and confirm with OK. If the port is not specified, the proxy server will establish the connection to the Mobile Session Print server on Port 80.
You receive a resulting display showing an inbound and an outbound rule.
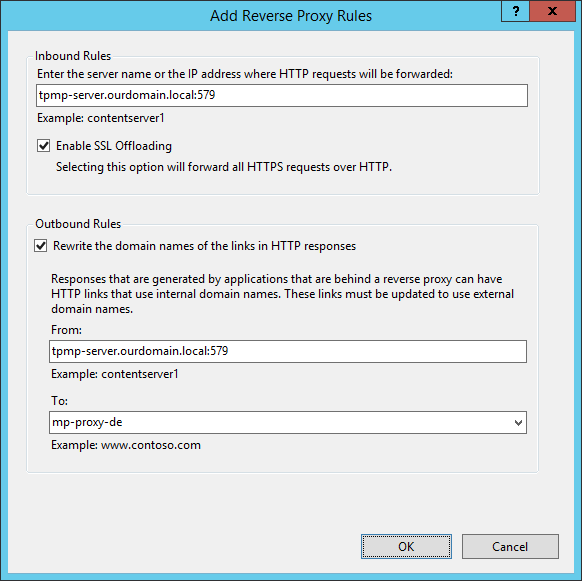
Reverse Proxy Rules: enter the addresses of the Mobile Session Print and proxy servers
Result: an inbound and an outbound rule
20. Open the inbound rule and select Add.
Inbound rule: click on Add
21. Add the following variables and confirm each one with OK:
HTTP_X_GW_DMZ_SECRET
= any (secret) character string (Replace the existing value enabled)
HTTP_X_GW_CERT_SUBJECT
= {CERT_SUBJECT} (Replace the existing value disabled)
HTTP_X_GW_CERT_FLAGS
= {CERT_FLAGS} (Replace the existing value disabled)
HTTP_X_GW_CERT_ISSUER
= {CERT_ISSUER} (Replace the existing value disabled)
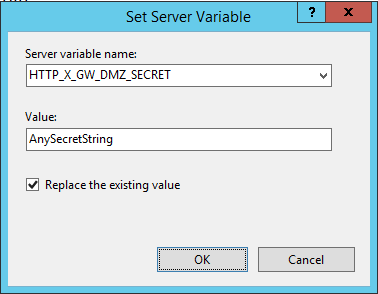
Inbound rule: adding variables
22. Save the variables with Apply.
Inbound rule: save variables
23. Restart the IIS – for instance, with the command iisreset on the command line.
24. Ensure that the proxy server is accessible from outside.
Configure the Mobile Session Print server
Mobile Session Print
1. In the IIS Manager, select the TPMobilePrint website and, from there, select SSL Settings.
IIS Manager: select SSL Settings in TPMobilePrint
2. Disable Require SSL and set Client certificate to Ignore. Save these settings with Apply or with Yes, when you see the prompt.
SSL Settings: Disable Require SSL and select Ignore with Client certificates
Between Mobile Session Print server and proxy server it’s not necessary to use encryption because it’s inside the company. But, of course, it’s possible.
3. If you have set up a special TCP port to work on the proxy server then you must also set it here. To do so, select Bindings for the Default Web Site and put the same TCP port in there, as is on the proxy server.
Default Web Site: select Bindings
Enter TCP port from the proxy server
4. Go back to the TPMobilePrint website, and select Add in Application Settings.
Adding a string value from the proxy server
5. Enter a new value with the (secret) string that you define on the proxy server.
Adding a character string from the proxy server (AnySecretString)
6. Restart the IIS – for instance, with the command iisreset on the command line.
Register Mobile Session Print with the proxy server
Open the Management Console on the license server – e. g. using any HTML5 browser at the following address:
https://<license_server_address>:4004/fw
Registering the proxy server on the TPNS
- Log in to the license server’s installation account e. g. using the ServiceAccount recommended above.
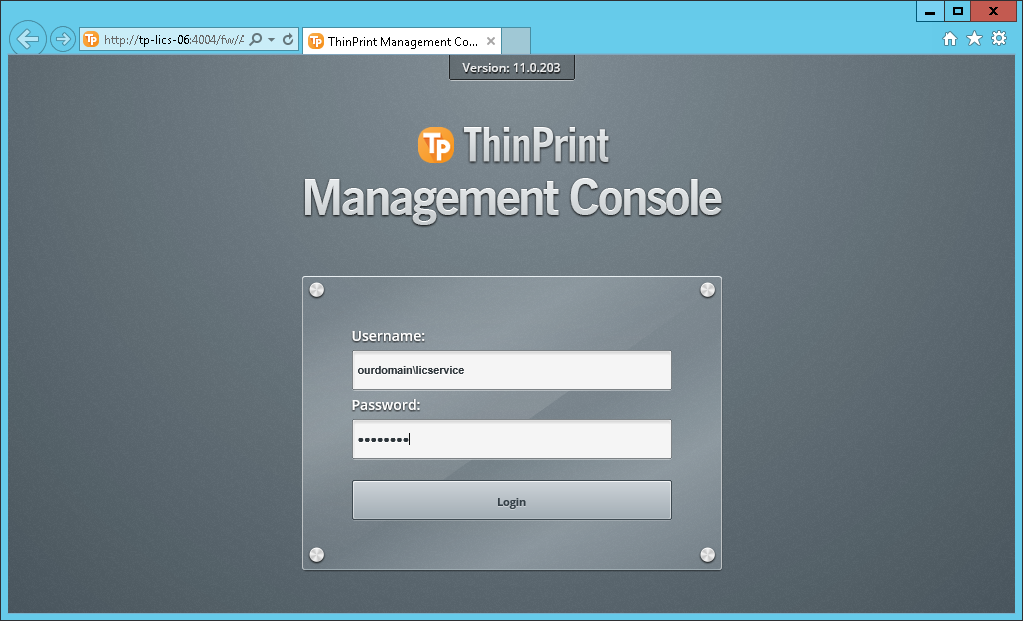
Log in to the Management Console
- Select Global Settings.
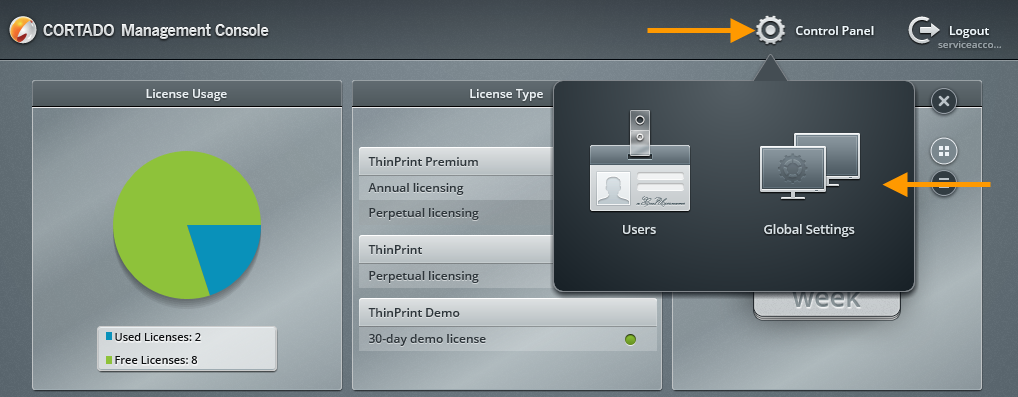
Start configuration with Global Settings
- Select Mobile Print→ Register Server.
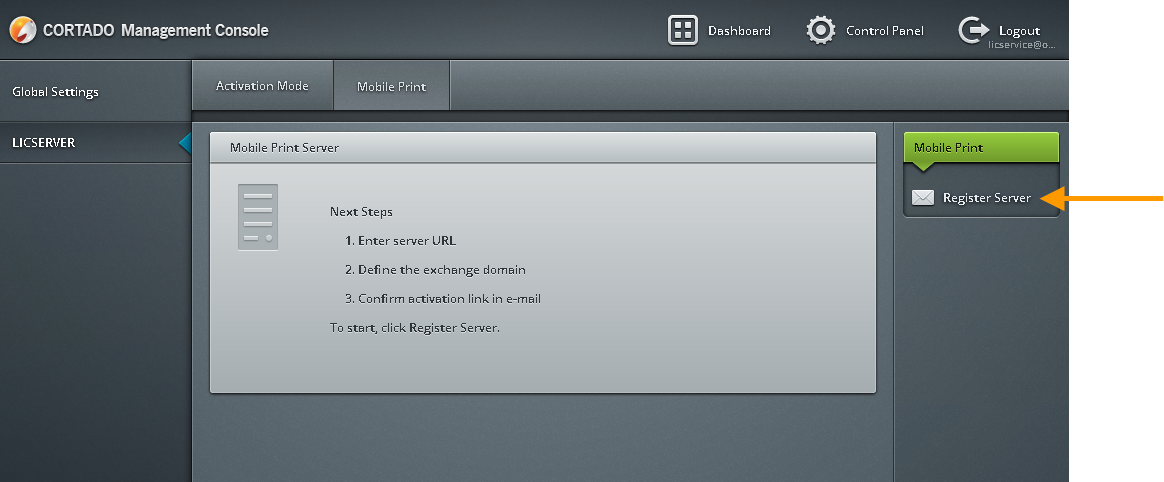
Starting registration of the Mobile Session Print server with the proxy server
- Enter the address of the proxy server in place of the Mobile Session Print server, together with the email address of an admin account. That way, the proxy server, as well as the email domain, will be registered on the TPNS.
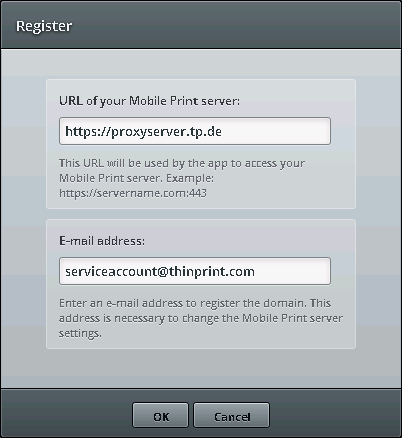
Enter the address of the proxy server and an admin email address
With registering Mobile Session Print at the TPNS not the server is registered but only the domain (thinprint.com) together with the e-mail address ([email protected]). So, there is no difference between registering a Mobile Session Print server or a proxy server. The domain is used for user authentication (only users of a registered domain are able to register their mobile devices). The e-mail address is used to confirm the domain registration. The URL shown in Illus. above will be used only by the mobile devices to access the Mobile Session Print server (via the proxy server). That’s why https is recommended here.
- When the message Confirm activation link in e-mail appears go to the mailbox of the specified user account, and confirm by clicking on the Verify button in the registration email.
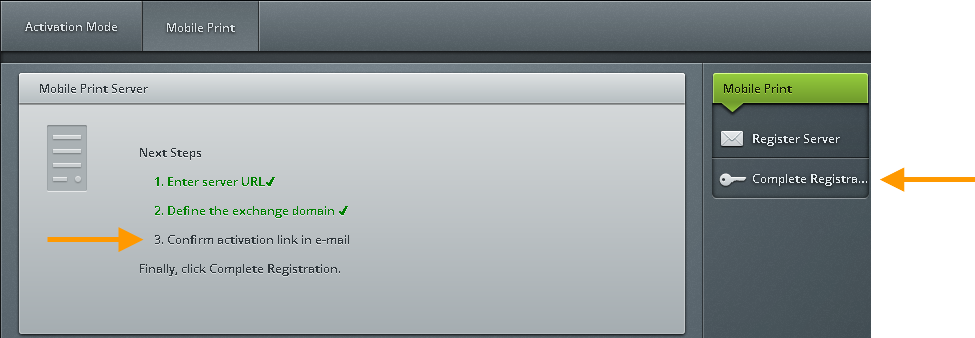
Go to the mailbox and then complete the registration
- Complete the server registration, as described in the section Registering Mobile Session Print server on TPNS.
Registering users and devices
- Enable the users for Mobile Session Print. See the section Enabling users for Mobile Session Print.
- Install the Session Print app on a mobile device and register it for a user. See the sections Installing the iOS app and Registering the device.
- Registration on TPNS will work but the app won’t be able to access the Mobile Session Print server at this point (see Finalize device registration), but must be executed to trigger generating the root certificate ThinPrintMobilePrint Instance CA (see below).
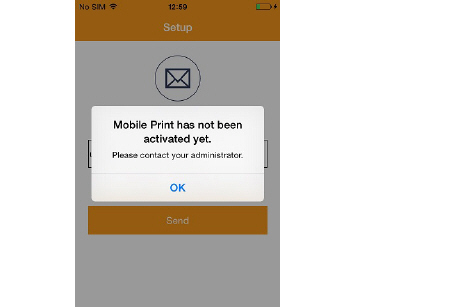
Accessing the Mobile Session Print server failed at this point
Settings on the proxy server
- Export the root certificate ThinPrintMobilePrint Instance CA from the Mobile Session Print server out of either the Trusted Root Authentication Authorities (Windows 2008 R2) or Client Authentication Issuers (Windows 2012 and later) certificate store – without Private Key –, and import it to the proxy server, into Trusted Root Authentication Authorities as well as additionally – from Windows 2012 – to Client Authentication Issuers.
- – Continue by placing the following registry values on the proxy server:
- Windows 2008 R2:
hkey_local_machine\software\policies\microsoft\systemcertificates\authroot\DisableRootAutoUpdate=1 - Windows 2012 and later:
hkey_local_machine\system\currentcontrolset\control\securityproviders\schannel\ClientAuthTrustMode=2
- Windows 2008 R2:
Further settings on proxys from Windows 2012
- Then, select Default Web Site in the IIS manager of the proxy server (from Windows 2012).
- Then select Add in Application Settings.
IIS Manager: Application Settings for Default Web Site
- Make a new entry with the name CAStoreName and the value ClientAuthIssuer.
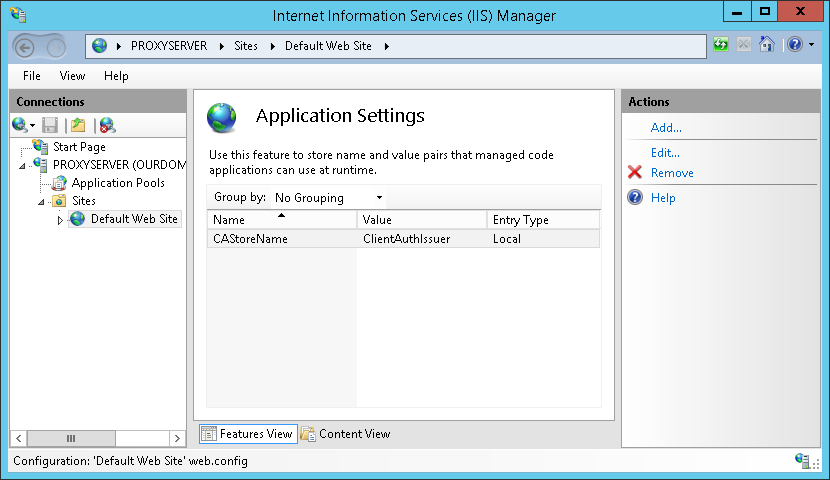
The certificate store name added to the IIS Manager
- Likewise for Windows 2012 proxys, set the value DefaultSslCtlStoreName [reg_sz] in the Windows registry, and enter the string ClientAuthIssuer here:
hkey_local_machine\system\currentcontrolset\services\http\parameters\SslBindingInfo\0.0.0.0:<proxy-port>
<proxy-port> is the TCP port that you have specified above.
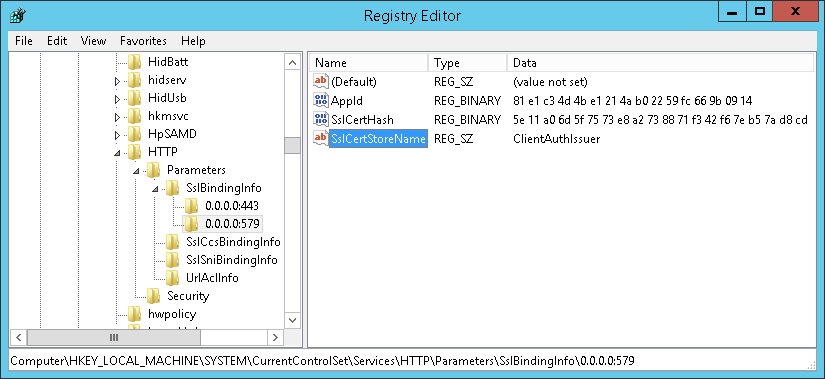
Name of the certificate stores added to the registry
- Check on the proxy server (from Windows 2012), that the name of the certificate store is now also in the web.config (in c:\inetpub\wwwroot).
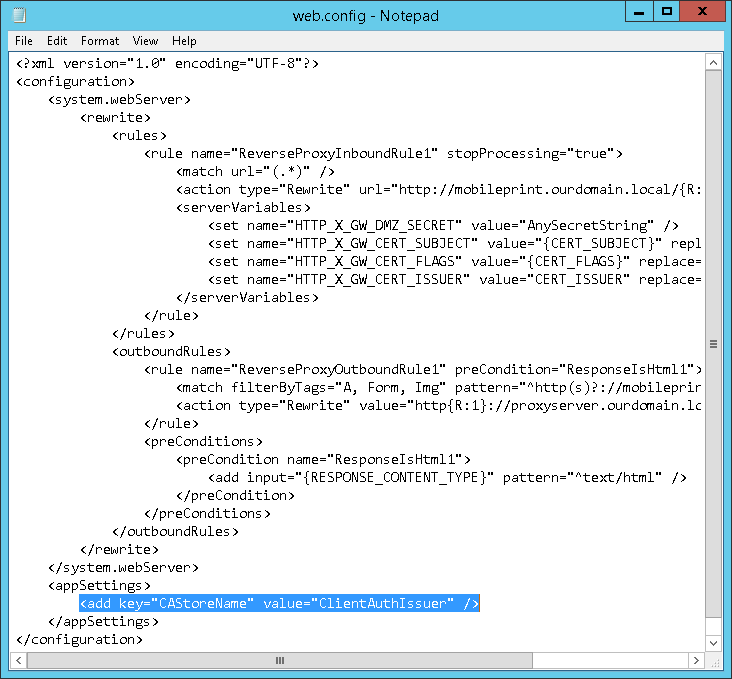
Certificate store name in the web.config
- To conclude, restart the http service – using, for example, the command
net stop httpand then netstart httpon the command line.
Should the start of http service fail with the first attempt, save the Registry key hkey_local_machine\system\currentcontrolset\services\http\parameters\SslBindingInfo\0.0.0.0:<proxy-port> (see above), remove it from the Registry and then start the http service. Afterwards install the saved key again and restart the http service.
Finalize device registration
- Repeat the previously failed device registration (see Registering users and devices).