After installing Mobile Print server, its Configuration Assistant automatically will open to guide you through the initial configuration. You can open it as well under Start→ Programs→ Mobile Print server→ Configuration Assistant. The settings made here can always be changed later by running the configuration wizard again locally, or by calling up the management console in the browser of any computer. There you will find the settings under Control Panel→ Global Settings.
With the initial configuration the following settings are specified:
- Entering the license keys
- Configure database
- Configure the connection settings with TCP ports and SSL certificates
- Configure certificates
- Prepare the e-mail forwarding between the mail server and Mobile Print server
- Define the path to the storage for Mobile Print server user directories
In a standard configuration, you can carry over the default settings in the Configuration Assistant and confirm each with Next.
Licensing
After you have confirmed the Welcome window by clicking on Next, another window will open (see illus.). Select Demo mode to try the software (with up to five users) for 30 days, or Enter license key(s), if you already have license keys.
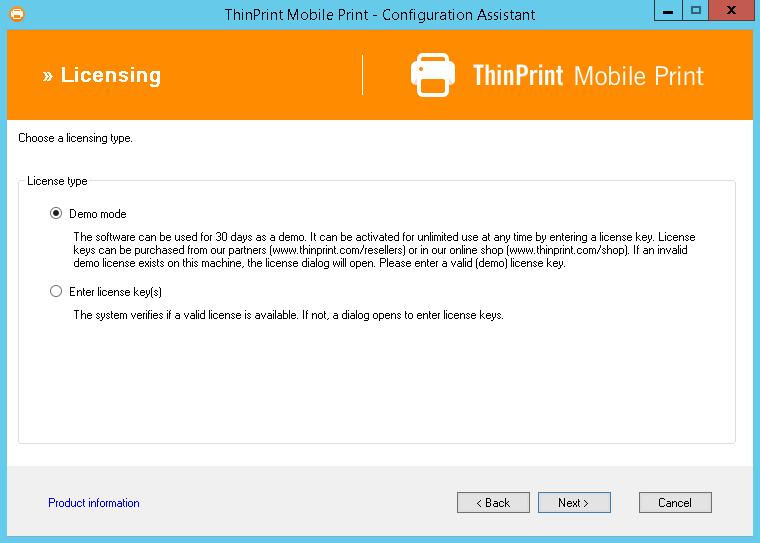
Choose licensing method
If you selected Enter license key(s), then the window (illus.) will open. Copy your license keys into the white field on the left in the illus. and click on Enter Licenses.
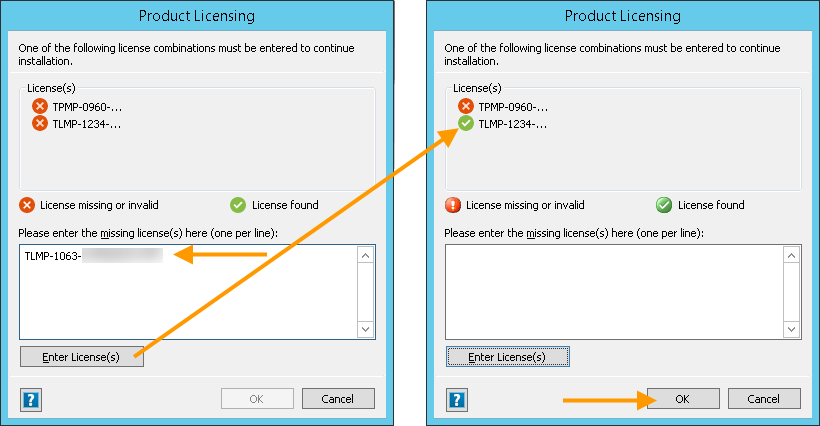
Entering license keys: Copy into the white field and click on Enter licenses
Then, one of the red circles with an exclamation mark will change to a green circle with a checkmark (above right in Illus.). Click OK to continue.
Note! After being entered, a license key will be valid for 30 days without being activated. For license key activation, go to Cortado Enterprise Portal: https://enterpriseportal.cortado.com
Database server
If you need to use the SQL database that was created during the installation of the Mobile Print server, leave the default setting (.\sqlexpress, see illus.). Otherwise, enter the SQL server here and, where applicable, the SQL instance. Or search for the SQL server by clicking on Browse. You also have the possibility to change the database name. Click Next to continue.
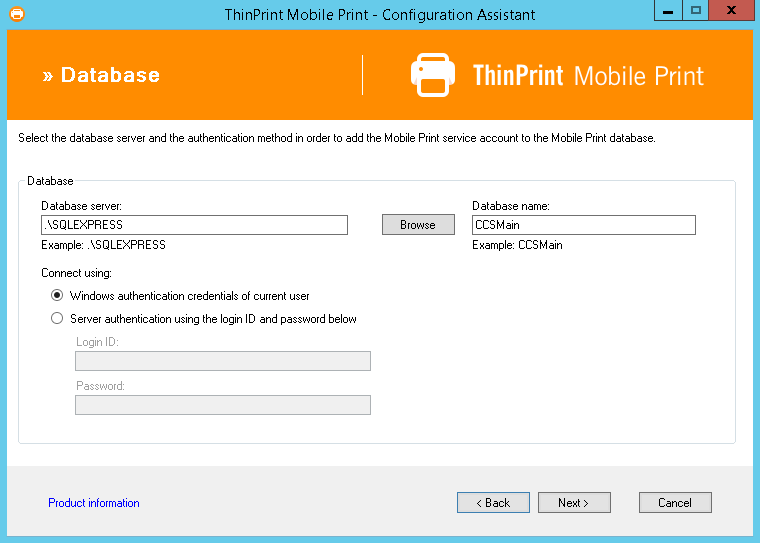
SQL server and instance
Configuration type
Click Next to continue.
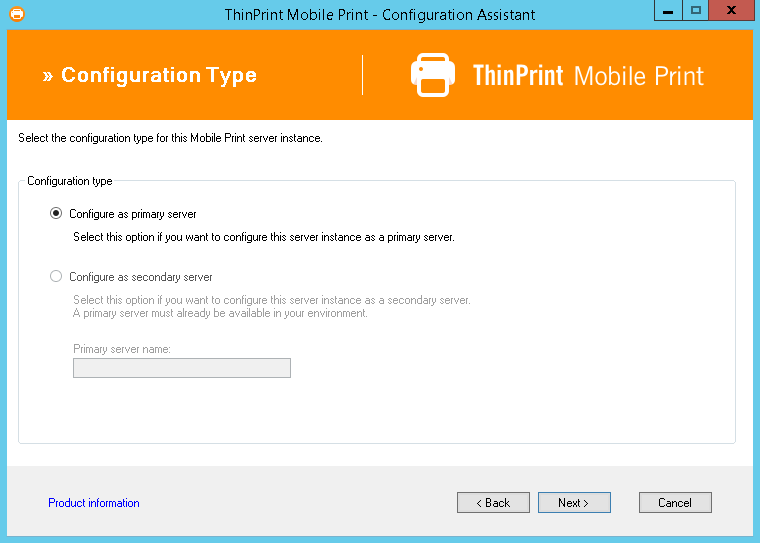
Confirm settings
Connection settings
In the connection settings enter the address of the Mobile Print server.
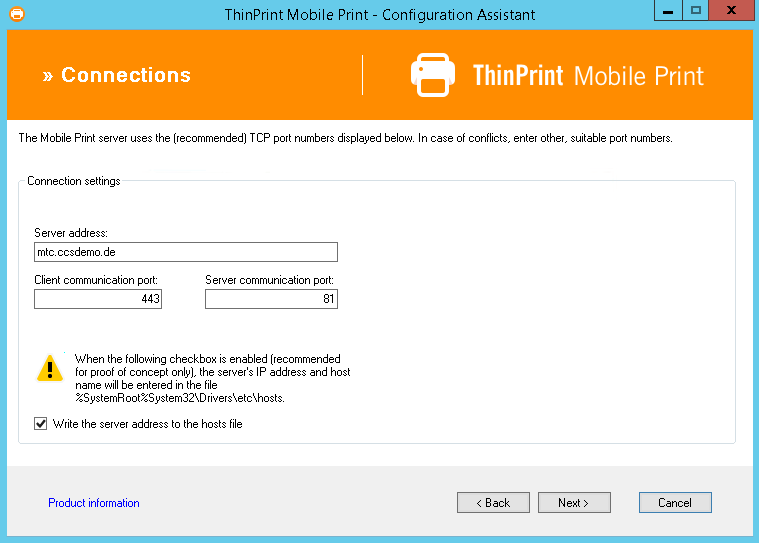
Connection settings
- Server address: Here you are prompted to enter the external host name or the external IP address (URL) or the Fully Qualified Domain Name (FQDN) of the Mobile Print server. This address will be written into Mobile Print Server’s SSL certificate and thus be used in browsers to open Mobile Print websites via https.
- Furthermore, the following TCP port is required:
-
- Client communication port: The default port for encrypted connections from the smartphones via https to the Mobile Print server is 443.
- Server communication port: This Port (81) is used only for software internal connections.
If these TCP ports are occupied by other applications select different ones.
-
- Write the Mobile Print server address to the hosts file: Enable this checkbox if you wish to install Mobile Print as a proof of concept. Disable this checkbox for the installation in a productive environment and make a corresponding entry in the DNS.
Note! Please note that your company’s firewalls must be configured accordingly for the external connections. Open the firewalls for all incoming connections on the port 443 that is required for Mobile Print.
Certificates
These certificates ensure the encrypted communication between the Mobile Print server and Mobile Print apps.
If you have your own or bought root and server certificates, you can select them with Browse. If you are using certificates of this type, they must be imported beforehand into the certificate store of the Mobile Print server, under Certificates (Local Computer)→ Trusted Root Certification Authorities→ Certificates (Root certifikate) and Personal→ Certificates (Server certifikate). In doing so, note that the root certificate must be imported together with the private key (see section Root and server certificates).
For a Proof of Concept, the Mobile Print server can generate own self-signed root and server certificates alternatively: using Create new self-signed root certificate and Create new self-signed server certificate here (see selections in illus.).
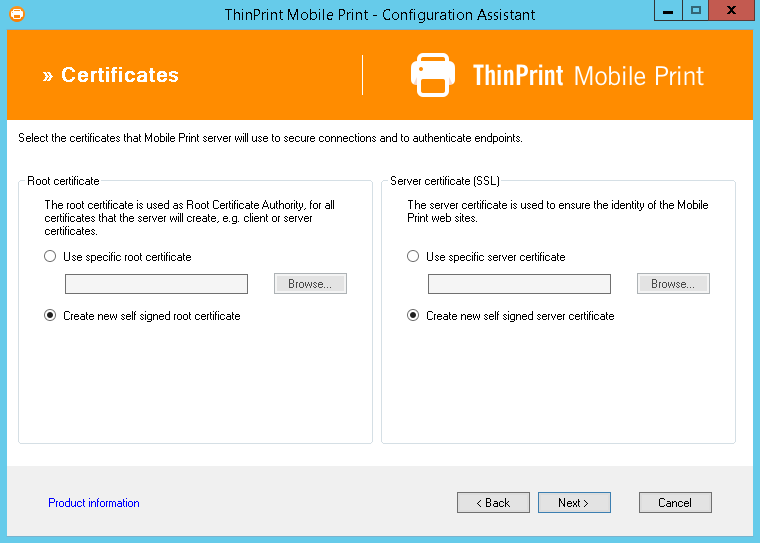
Selecting certificates or creating new ones
Users will receive the root certificate later as part of the welcome email for downloading to their mobile devices. When using an MDM solution, it can alternatively be pushed onto the user’s devices. It is used to check the trustworthiness of a server certificate. As soon as the browser of the device requests an https page from the Mobile Print server, it sends the server certificate to the device.
Note! The server certificate which is created here (if necessary) contains the server address specified in the External connection settings menu. Make sure that this address is reachable from the devices.
Account and e-mail settings
In the next window prepare the e-mail forwarding between the mail server and Mobile Print server. Integrate here your Microsoft Exchange Server. If you don’t want to include a mail server or if you use Lotus Domino or Novell GroupWise, a connector is created to forward the emails to the Mobile Print server.
- Enter at the top an account with local administrator permissions. This account is used by services and applications if they need administrator permissions for a particular process. We recommend the Service account that you’ve used for the installation (see section Setting up Service account). This account requires an Exchange mailbox if you are using Microsoft Exchange.
- Below, enter the address of the (primary) mail server (here: ex02.ccsdemo.de).
- Finally, enter the address of the connector (with Microsoft Exchange), the name of the SMTP Foreign Domain (Lotus Domino) or the route (Novell Groupwise Internet Agent for SMTP) that you will create on the mail server after the initial configuration of Mobile Print Server as shown in (arbitrary; suggestion: thinprint.local.
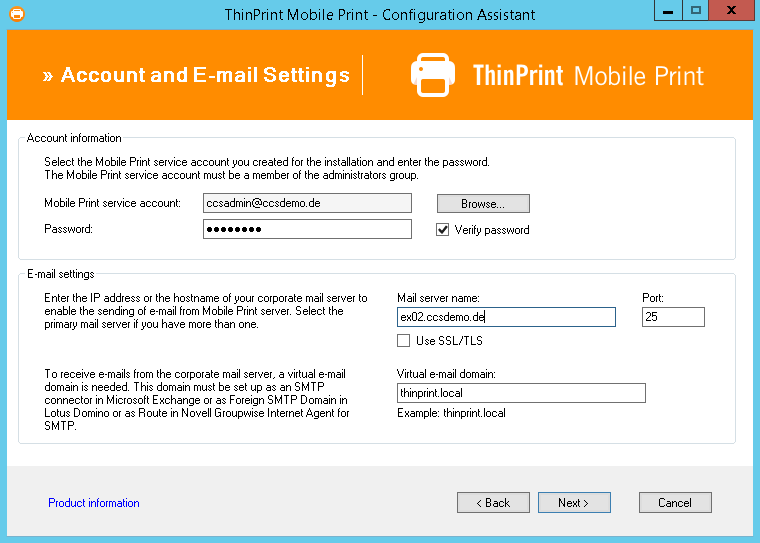
Settings for e-mail forwarding (example for Microsoft Exchange)
Finishing
When you click Next, the selected settings for initial configuration will be displayed.
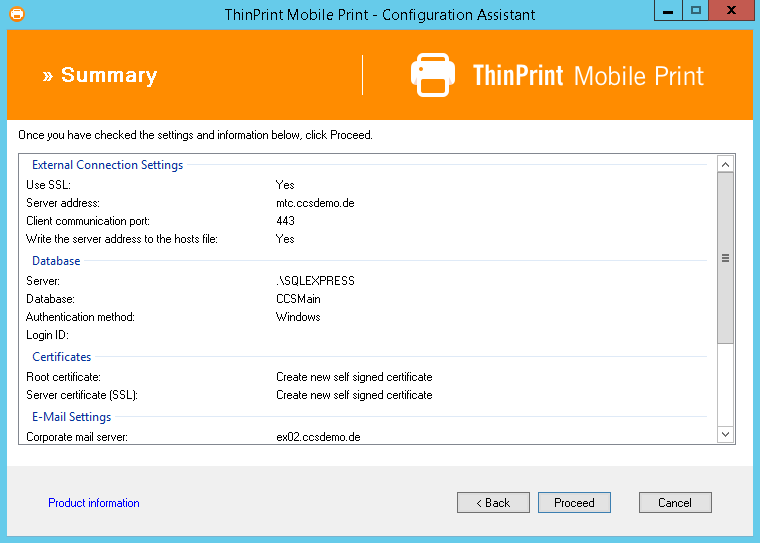
Initial configuration summary (section)
Verify the information. If everything is correct, click Next to continue. The services will now be configured. Initial configuration is finished when a green checkmark appears next to all the services. If a red cross appears you can double-click it to show an error description.
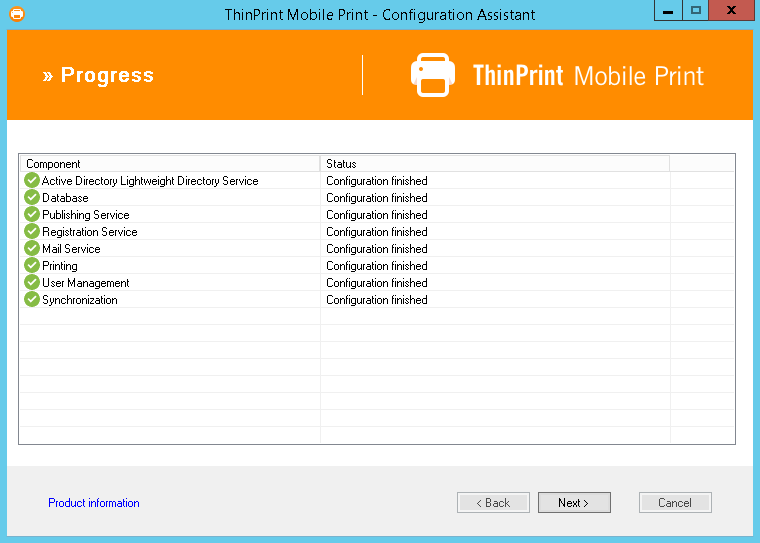
All components have been successfully configured
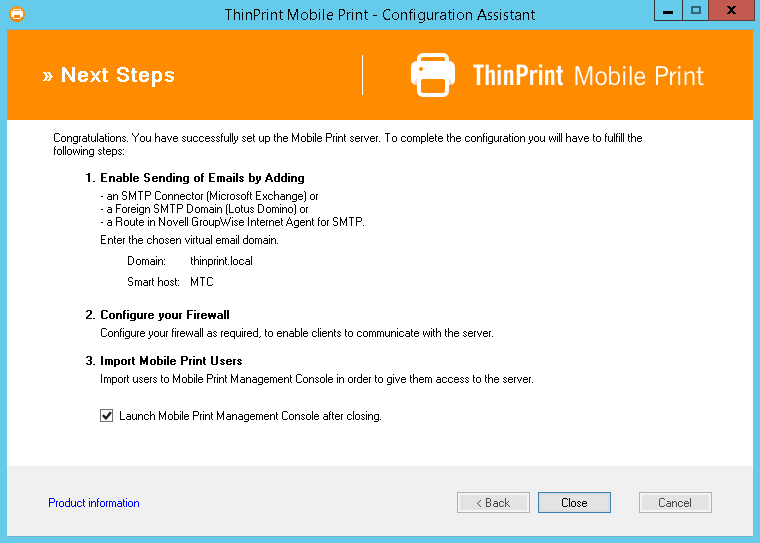
Click Next. An information window with further instructions will open. Close the window. With the Launch Mobile Print Management Console after closing, checkbox enabled, after the window closes, the management console will open automatically in your default browser. Alternatively, you can open the management console in the browser of any workstation. With the Launch Mobile Print License Manager after closing, checkbox enabled, after the window closes, the t License Manager will open automatically. If you already have license keys, you can enter the keys here.
Configuration finished