To enable user groups from the Active Directory (AD) to access ThinPrint Mobile Print quickly and easily, it is advisable to create group templates. Each AD group can be assigned a template directly. Thereby, potential conflicts due to classification of hierarchies of templates are avoided. Regardless of this, specific rights can still be assigned to individual users – as well, changes can be made to the templates, for new users only, or for all existing users. The templates will be applied on the import of one or more users.
Note! If you want to manage the users of ThinPrint Mobile Print using group templates, we recommend that you first create the templates and then import the users.
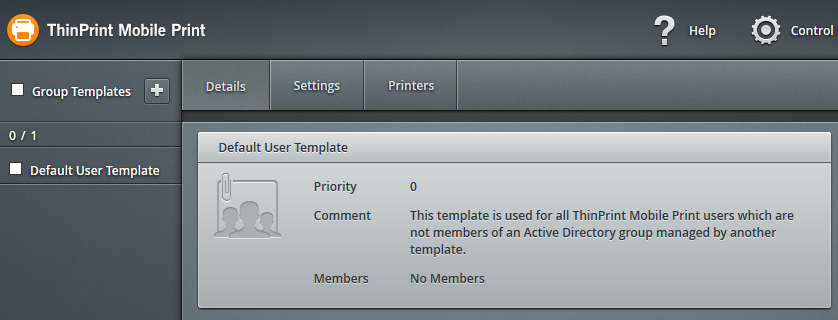
Default User Template
This template is for all users for whom no group template is set up. If a user for whom no group template exists is imported, the Default User Template is automatically assigned during the import.
Default User Template
You can assign specific properties (Settings, Printers) to the Default User Template.
Set up group template
If you want to assign different printers or settings to different user groups (AD groups), you can set up a separate group template for each group. It doesn’t matter if it’s dealing with Mobile Print server’s Active Directory or another; the only condition is that with several Active Directories a two-way trust must have been set up.
- Click on the plus icon under Control Panel→ Group Templates and then on Active Directory.
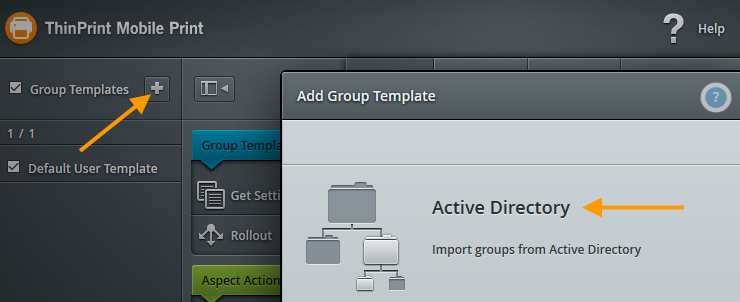
Adding group templates
- Select the Active Directory or the Active Directories and then Groups.
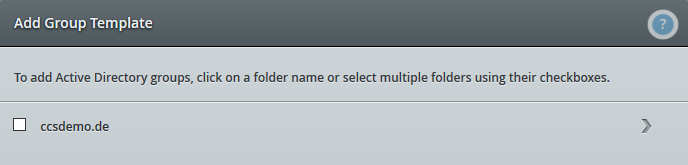
Select Active Directories
- Select the AD groups for which you want to set up the templates , and click first Import and then Close.
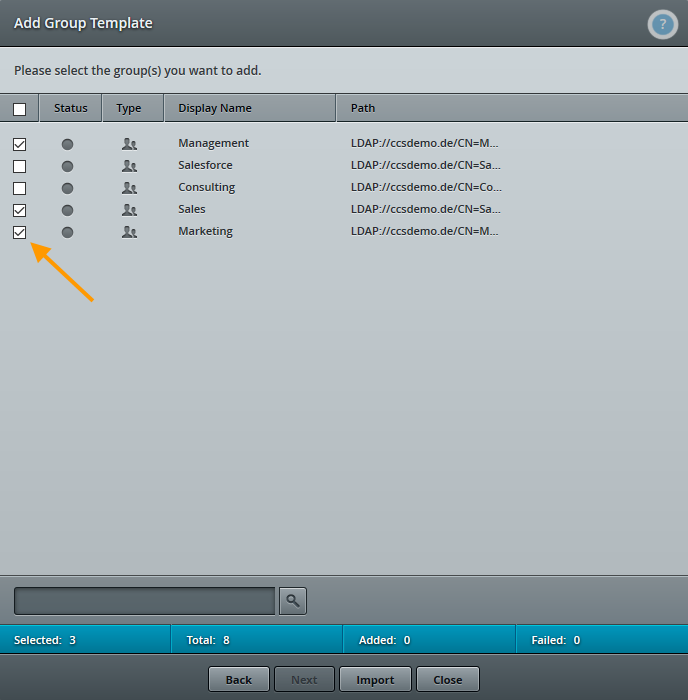
Select AD groups
Then the new templates will be displayed in the left column.
Templates set up for three AD groups
You can assign specific properties (Settings, Printers) to the group template.
Manage group templates
Edit, Remove, Get Settings
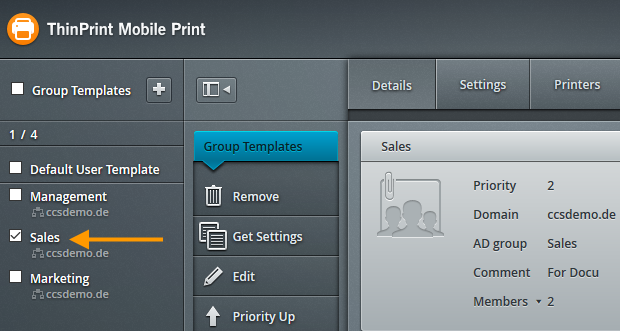
Select a template, then you can use Edit, to add a comment. With Remove you can also remove it again.
Select Get Settings, if you want to apply settings you already assigned to one user to another user.
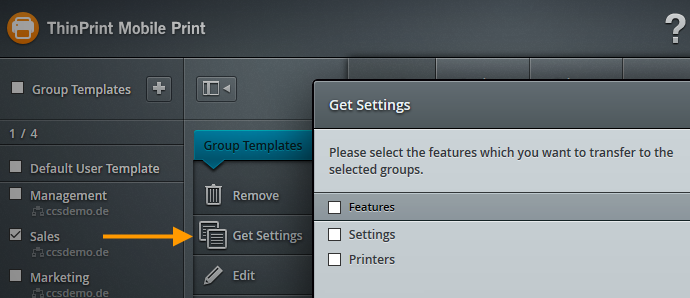
Get settings of other group templates
Set priority of group template
If a user is a member of multiple AD groups, the valid template for him will be the one closest to the top in the tree structure. You can change the position of a template with the option Set Priority. Enter a 1 here to move the template into first position (after the Default User Template). With the options Priority Up and Priority Down you can move a template in single steps higher or lower.
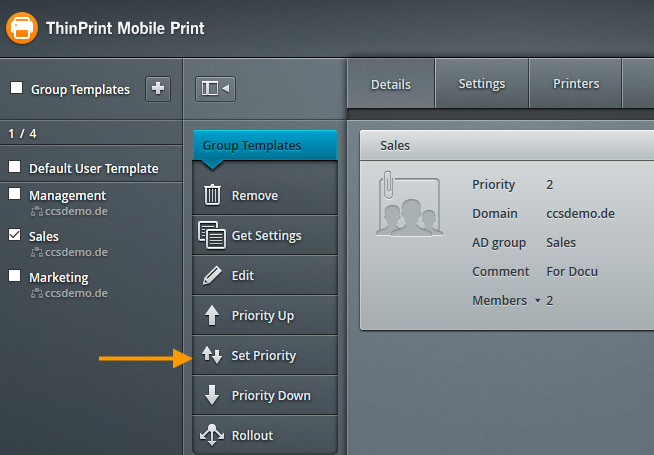
Set priority
Retroactive group template (Rollout)
Note! If you set up a template for an AD group for which the users have already been imported into the user management, then the new template will only apply to those users imported after this time.
- If you want this template to apply also to all previously imported users, use the Rollout option (left arrow in Illus.).
- If, on the other hand, you would only like to add a new aspect to the template (e. g. changes to the settings or the printers) use the Rollout button on the right side (right arrow in Illus.).

Rolling out the properties of a template for previously imported users
If, for example, a new printer is added to a group template, highlight the printer (left arrow in Illus.) and then select the Rollout option (right arrow in Illus.). This allows a saving on data volume. If no printer is selected, all printers (regardless whether newly added or pre-existing) will be rolled out.
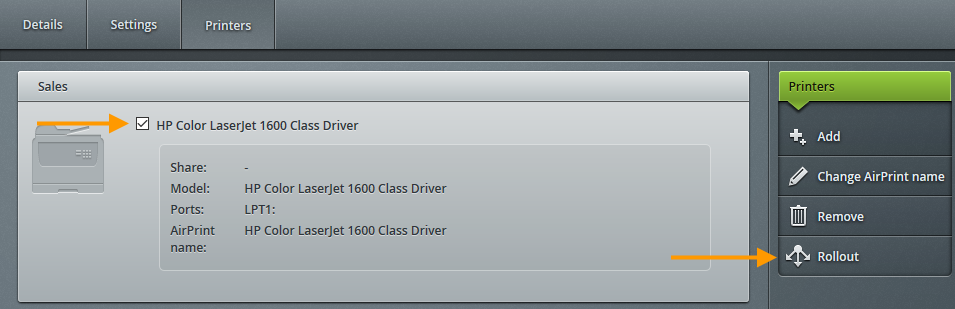
Rolling out a printer for previously imported users (example)