Configuring the Personal Printing app
The Personal Printing app is available for iOS devices and for Android devices (up to version 5.0). The users can download the app from the Apple App Store or the Google Play Store. Alternatively, you can use an EMM/MDM solution to distribute the app onto the users’ devices.
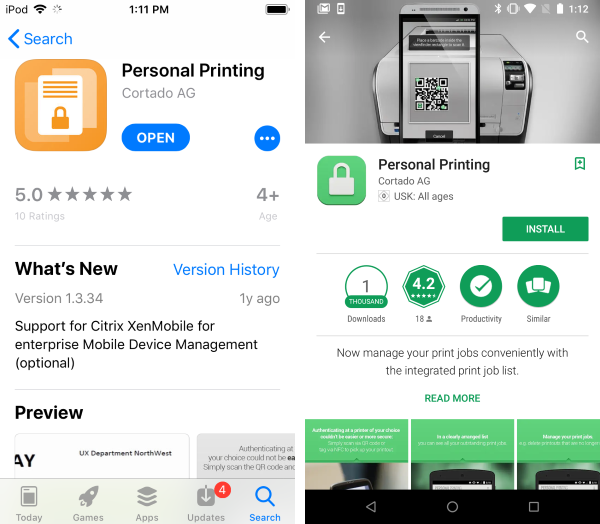
Personal Printing app in the Apple App Store (left) and in the Google Play Store (right)
After they have downloaded the app, the users have to use the Personal Printing app to open the configuration file (see illus.), which they received by email. That will start the configuration.

Configure Personal Printing app (example iOS)
If the configuration is successful, the users will now find the server address and the user ID in the app’s settings.
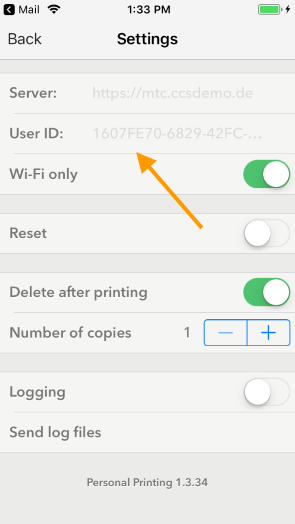
Successfully configured app
Printing with the Personal Printing app
If the users want to print from the Mobile-Print app, they do so by selecting Personal Printer.
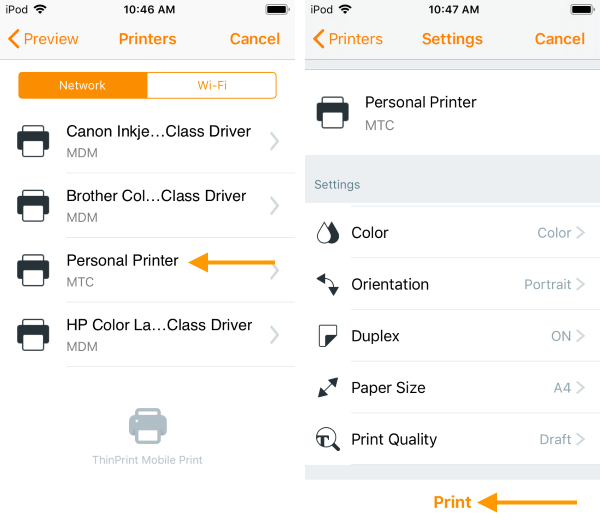
select the Personal Printer in the Mobile Print app and print
Then the users go to any printer that is set up for Personal Printing (see the section Setting up target printers). At the printer, the users open the Personal Printing app.
open Personal Printing app (left iOS, right Android)
After opening the Personal Printing app, a list of all existing print jobs will be displayed. Users can select one or more print jobs (upper arrow in the left illus.). Then they tap on the scan button (lower arrow in the left illus.) and scan the QR code with the camera on the smartphone (right illus.).
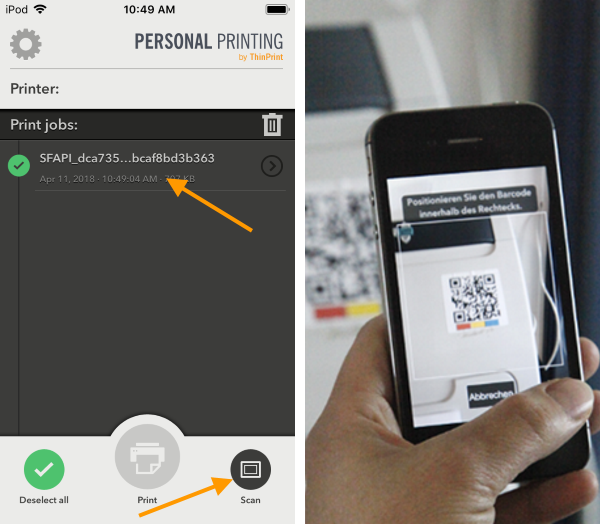
select file and scan QR code
If a PIN request has also been set up, the users have to enter their PIN now (see the section Configure smartphone users).
After selecting the desired file, the users tap on Print.
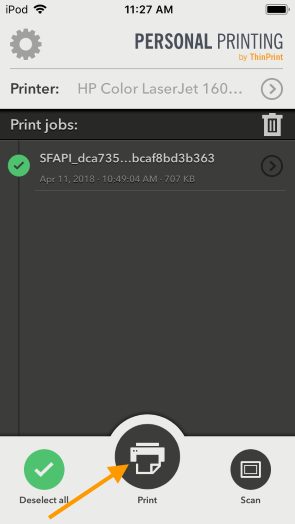
start printing