Adding a central print server
To add a central print server, proceed as follows:
- Install the ThinPrint Engine on the new central print server.
- If needed, install the necessary printer drivers on this server.
- Incorporate the print server into the Management Center.
- Create new Connections for it or assign the print server to a group of central print servers (see below).
- Select Apply Configuration for this Connection or for the respective print server.
Groups of central print servers
With Extra→ View→ Enable Central Print Server Groups, you can show another node in the tree view of the Management Center console. This allows you to create groups of central print servers that:
- should be configured identically and
- should share the bandwidth of one connection
This can pertain – for example – to all print servers that are node computers of the same NLB cluster or of a Windows Server 2012 cluster.
Please note: A print spooler instance of a Microsoft Failover Cluster (up to Windows Server 2008 R2) is not set up as a group but as a simple print server – unlike an NLB cluster.
Note! First, setup the central print server, then the central print server groups, and finally the corresponding Connections. An existing Connection cannot be retrospectively assigned to another print server or group.
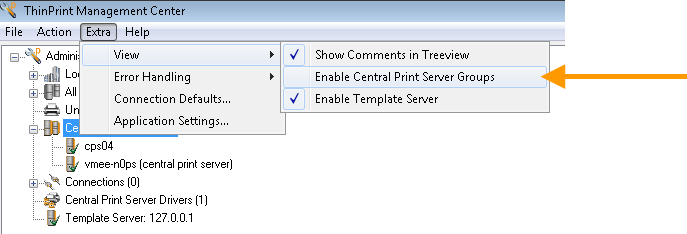
show groups of central print servers
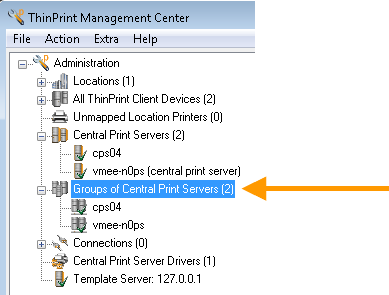
groups of central print servers shown
Above is described how to add two print servers to a common group. In its initial condition, every print server has its own group.
- Select New in the context menu of the Groups of Central Print Servers.
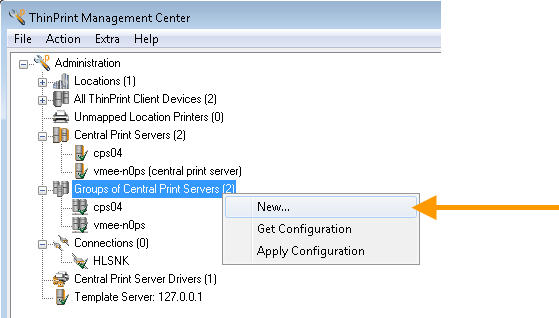
assigning print servers to a group: Select New
- Assign a name to the new print server group – for example, ps – and move the print servers cps04 and vmee-n0ps to this group using the arrow buttons.

assigning a name to the print server group (here: ps) and add both print servers to it
- Provided that Connections have still not been set up for this central print server, you can delete the nodes of the groups no longer needed (here: cps04 and vmee-n0ps) from the branch of the print server groups.
- If you get a message that the print server can’t be removed because it’s in use, remove the relevant Connection(s) before (Deleting a Connection).
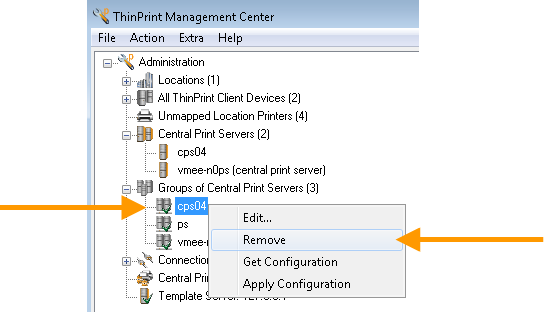
deleting print server groups which aren’t needed anymore
- Now, you can create a new Connection for the new print server group. To do so, open the context menu of the node Connections with New and assign the Connection to the new ps group. (For setting up a Connection, see section Praxis: Creating and connecting printers.)
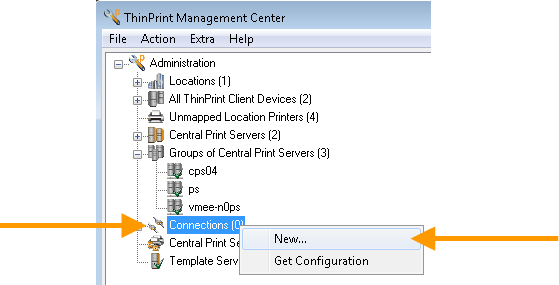
creating a new Connection
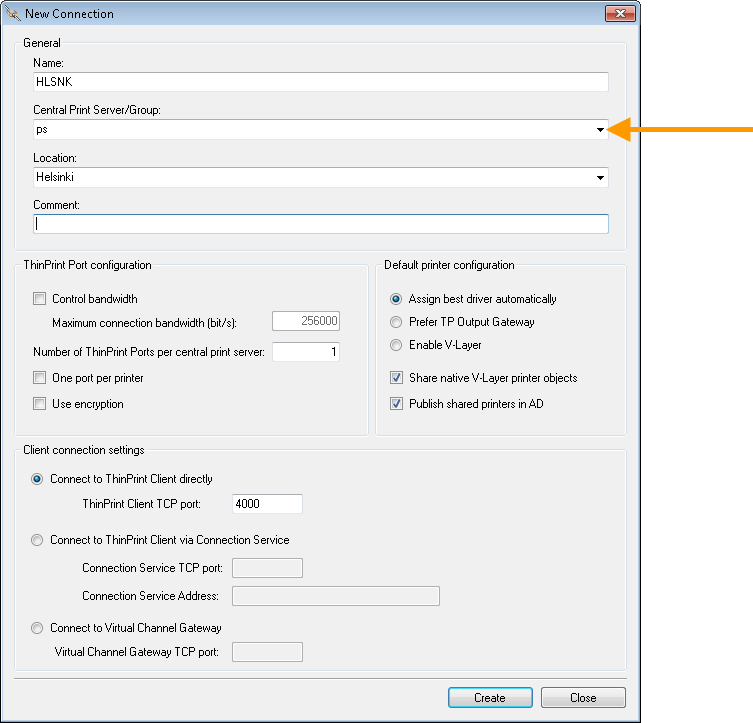
assigning the new group ps to the HLSNK Connection if necessary
Relocating to another central print server
Management Center allows you to move from a print server to a new one. All printers that were previously created on the old print server are added to the new print server.
We recommend running a backup of the SQL database beforehand. Proceed then as follows:
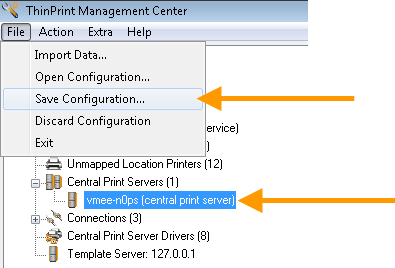
backup of existing configuration
Requirements: The previous print server must be present in the Management Center (lower arrow in the screenshot. above, here: vmee-n0ps), the new print server has not yet been added.
- Click in the menu bar of the Management Center on File→ Save Configuration (upper arrow in the screenshot above). An .xml file is created, save this to a suitable location.
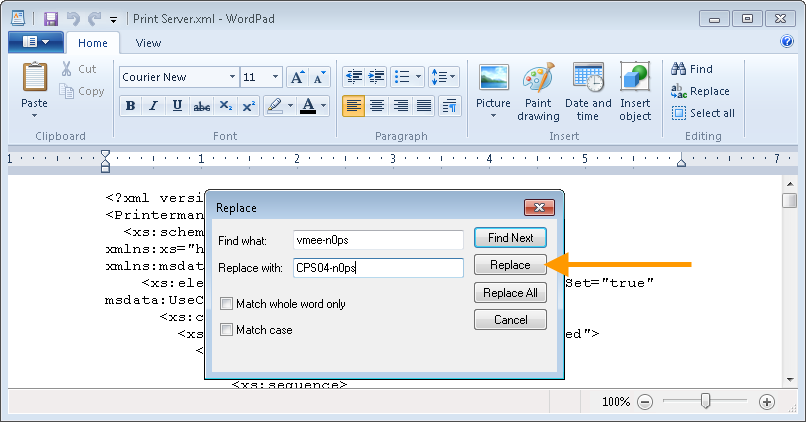
Replace the previous print server with the name of the new one
- Then open the .xml file which was just created in a WordPad (or Notepad). Search in the file for the name of the previous print server and replace it with the name of the new one. Backup the file by saving it under a new name.
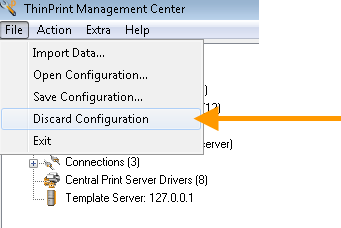
discarding the existing configuration
- Then click in the menu bar of the Management Center on File→ Discard configuration, to discard the existing configuration. Beforehand, you can save a backup copy of the configuration (.xml file).
- Click then on File→ Open Configuration and select the modified file with the new print server name.
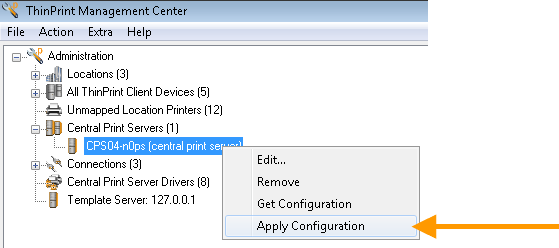
clicking on Apply Configuration to create printer objects
- Select at Central Print Servers, the new print server and then click on Apply Configuration to create the printer objects.