Adding printers
Workstation or local print server
What needs to be done, if a new printer has been connected to a workstation or to a local print server? The workstation or the local print server may be running on various operating systems – e. g. Windows, Mac OS or Linux.
- Create the new printer on the computer. Enable the printer in ThinPrint Client; the up-to-date version of ThinPrint Client Windows does this automatically.
new printer has been created on a workstation (example for Windows)
- Select Get Configuration from the context menu of the relevant ThinPrint Client node.
importing ThinPrint Clients printer list
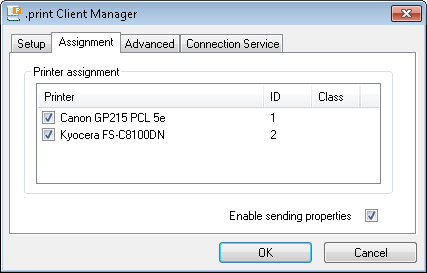
- Select Edit to edit the printer list. If printers appear which aren’t needed oder don’t exist any longer you can delete them here. To do so, mark the respective printers and then press the Del key.
removing a printer which isn’t needed or doesn’t exist any longer
- Select Edit Printers for the relevant Connection.
opening the Edit Printers menu of a Connection
- Here, you enable the checkbox for the new printer, select the print mode (Driver Free Printing vs. V-Layer vs. Native Printing), and click OK to confirm.
selecting the new printer in the relevant Connection (example)
Furthermore here you’ll find the following buttons:
Select All: Enables the checkmarks of all printers
Select None: Disables the checkmarks of all printers
- Then click on Apply Configuration for the relevant Connection to create printer objects for the newly discovered printers.
selecting Apply Configuration for the relevant Connection
ThinPrint gateway appliance
What needs to be done, if a new network printer has been installed in a branch office in which a gateway appliance is being used?
- Create the newly installed printer in the web console of ThinPrint Gateway.
new printer on ThinPrint Gateway (example for ISD400 from SEH)
- Switch to the Management Center console. Select Get Configuration in the context menu of the relevant ThinPrint Client node.
re-importing ThinPrint Client’s printer list
- For printing to ThinPrint Gateways, use the V-Layer print mode. To do so, you need the native driver for the new printer. Check whether this is already present in the Driver Pool and set up on the template server (Printer drivers and Template Server).
- Open the Edit Printers menu for the relevant Connection. Enable the checkbox of the new printer here, select the print mode (Driver Free Printing vs. V-Layer vs. Native Printing), and click OK to confirm.
selectng the new printer in the relevant Connection (example)
Deselecting printers
- If you want to disable a printer for the Management Center (e. g., to reduce the number of used licenses), only disable it in the Printers menu of the respective Connection.
Unused printers (Unmapped Location Printers)
The Unmapped Location Printers node should solely serve to provide you with information. Here, all printers are displayed that have been transmitted by the ThinPrint Clients, but not – or not yet – installed on the central print servers. This is the case when you have either not yet (or not successfully) run the Apply Configuration function or not selected some printers in the Edit Printers menu of a Connection.
printers retrieved from ThinPrint Clients, but not created on the central print servers