- In the printer’s web console, select Configure ThinPrint Client in the Copy/Print tab.
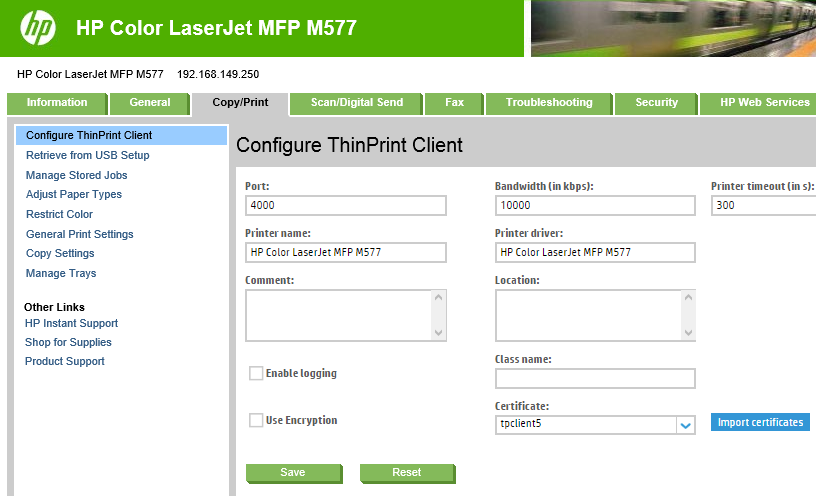
ThinPrint Client configuration page
The web console for the ThinPrint Client appears. This provides the following features for configuration:
| Menu | Function |
| Port | TCP port, on which the ThinPrint Client “listens”; default: 4000 |
| Bandwidth (kbps) |
• bandwidth value (optional) • must be smaller than, or equal to, the value in the ThinPrint Engine • if the value is greater, or the client control has been deactivated on the server side, the server values will be used |
| Printer timeout (in s) |
timeout if printing failed (in seconds) |
| Printer name | the name of the printer (for ThinPrint printing) |
| Printer driver |
the name of the printer driver (optional) (info field for Management Services) |
| Comment | comments field for the printer name (optional) |
| Location | location information for the printer (optional) |
| Enable logging |
• enable logging for the ThinPrint Client (optional) • the logs can be exported with the option Create zipped debug information file, found in the Troubleshooting→ Diagnostic Data menu, for sending to ThinPrint support for analysis (file format: .jdp). |
| Class name |
• printer class for AutoConnect (optional) • the class name – in contrast to the printer name – must not be longer than 7 characters and can contain no spaces |
| Use encryption |
• activate encrypted printing (optional) • if enabled, the ThinPrint Client no longer accepts unencrypted print jobs |
| Import certificates |
• upload client certificates for ThinPrint printing (optional) • see the section Importing certificates |
| Certificate | select a client certificate for ThinPrint printing (optional) |
| Save | save your entries |
| Reset | reset all settings to their default values |
Exporting the ThinPrint Client log file