Besides the method described in this and the following sections, you can also create certificates with OpenSSL. Here, we will show you how to create certificates using an example for Windows Server 2016. (for more detailed information about Microsoft Certificate Services, please also refer to the Microsoft documentation). Below are step-by-step instructions for setting up a certification server, creating a root certificate, and requesting certificates for central print servers and ThinPrint Clients from the certification server and then installing them on servers and clients. You must have administrator permissions on all involved machines.
Certification server
It is recommended that you set up a certification server that is only responsible for certification and on which no other programs are running. The certification authority is set up and the root certificate created on this server. The client and server certificates are requested and issued here. Once this operation is complete and all certificates have been distributed to the server and clients, the certification server can be turned off – until a new certificate is needed. The root certification authority on the certification server is computer- and domain-specific and cannot be stored on another computer.
- On the certification server, open the Server Manager. Select Add roles and features, then Role-based or feature-based installation and finally the following server roles:
- Active Directory Certificate Services
- File and Storage Services
- Web Server (IIS)
- Confirm by clicking on Next.
select server roles: enabling AD Certificate Services and Web Server (IIS)
Note! The root certificate is computer-specific. For this reason, changing the machine name or domain membership isn’t possible.
- Select the Role Services that have to be installed for the Active Directory Certificate Services. For this purpose, select Certification Authority and Certification Authority Web Enrollment. Confirm with Next.
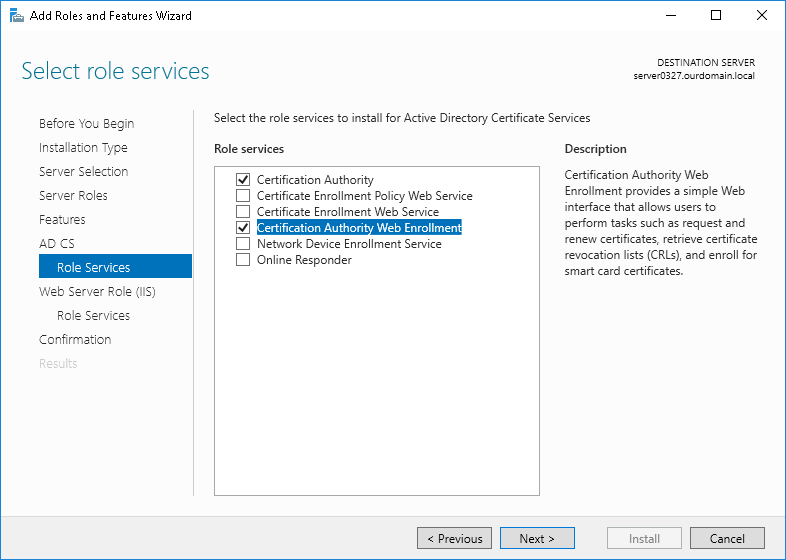
select role services for AD Certificate Service
- Confirm the required Role Services for Web Server (IIS) by clicking on Next.
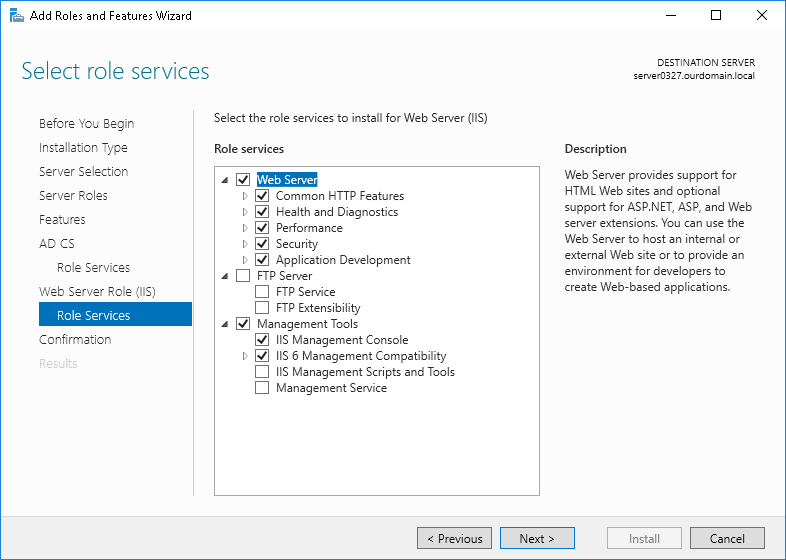
confirm the role services for Web Server (IIS)
- The next window shows a summary of the roles to be installed, along with their services. Click on Install to start the installation procedure.
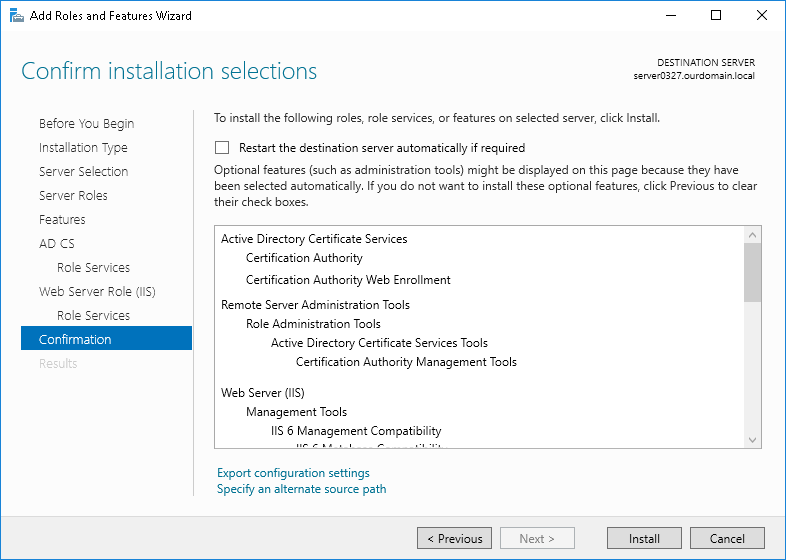
starting the installation
- During the installation, a link appears, prompting you to make the necessary settings for the Certificate Services. Click on this link.
setup during installation
- Select an account with which you want to configure the role services. Confirm with Next.
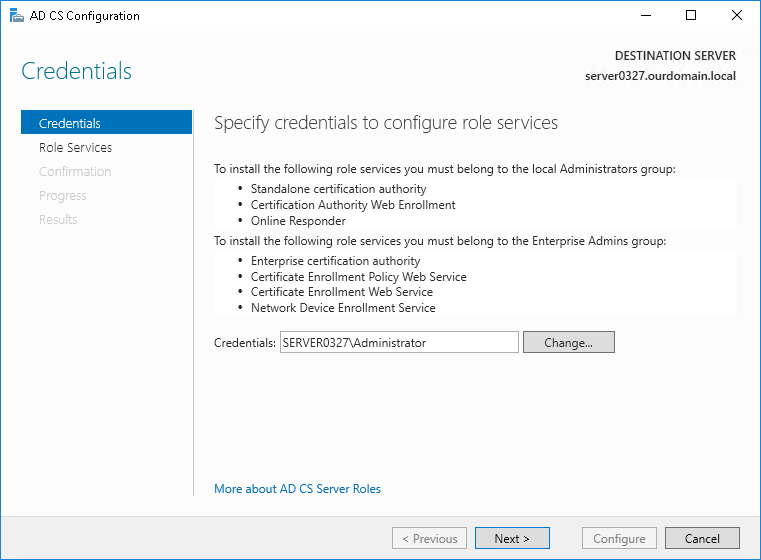
selecting a configuration account for the role services
- Select the role services to be configured. For this purpose, tick Certification Authority and Certification Authority Web Enrollment. Confirm with Next.
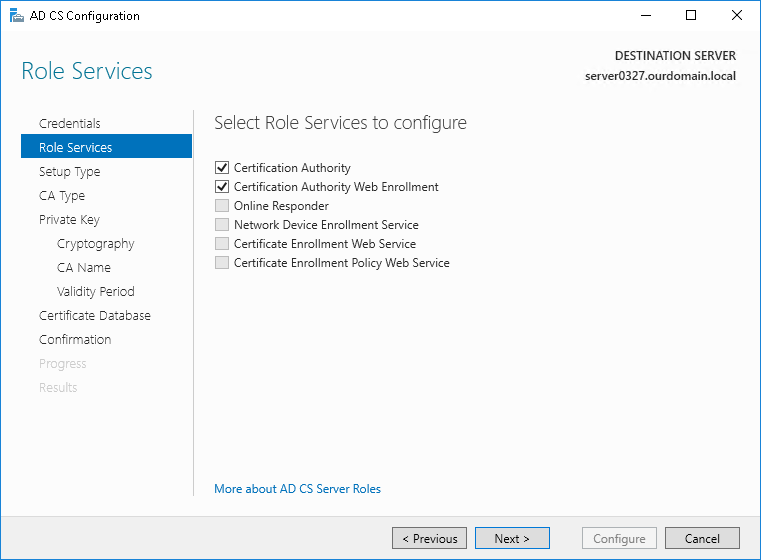
selecting the role services
- Specify the setup type for the certification authority (CA) – if in doubt: Standalone CA. Confirm with Next.
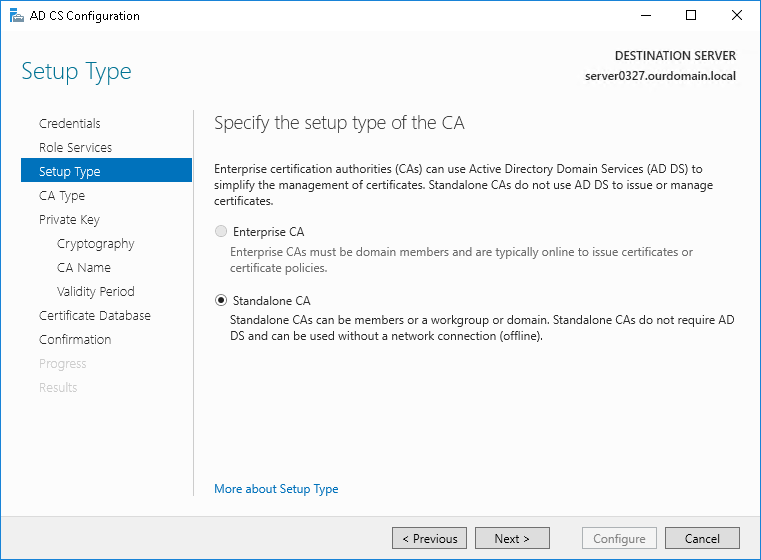
specifying the certification authority type
- Select Root CA when you set up the first certification authority of a hierarchy. Confirm with Next.
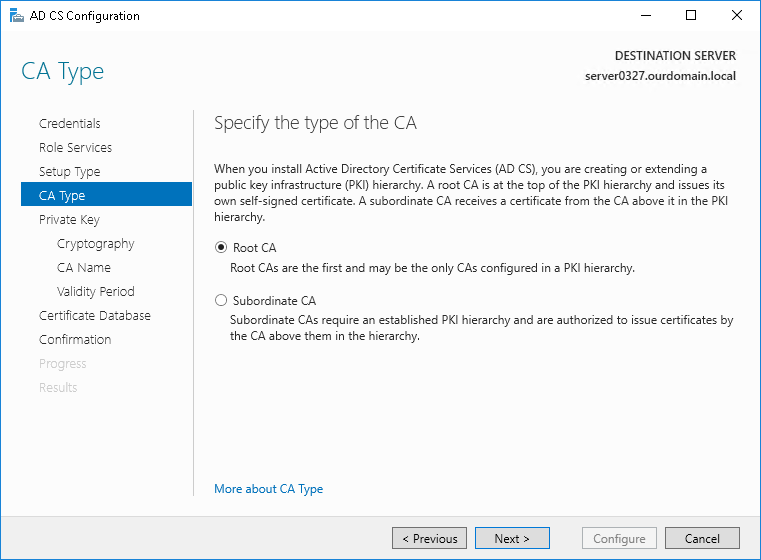
selecting Root CA
- Select Create a new private key if you do not already have a private key. Confirm with Next.
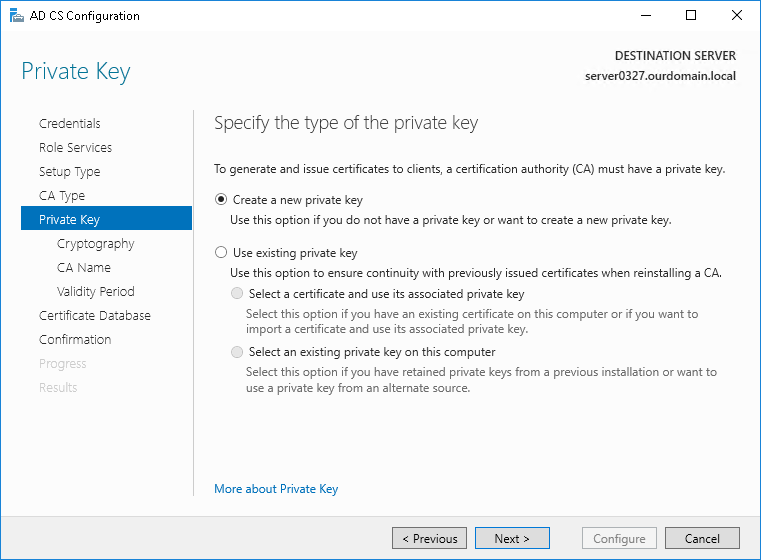
a new private key is to be created
- Determine the cryptography for the new private key to be created. To do this, select:
- a cryptographic provider
- the key length (recommended: 2048 or more)
- the hash algorithm (recommended: SHA256 or higher)
- If in doubt, keep the settings as shown. Confirm with Next.
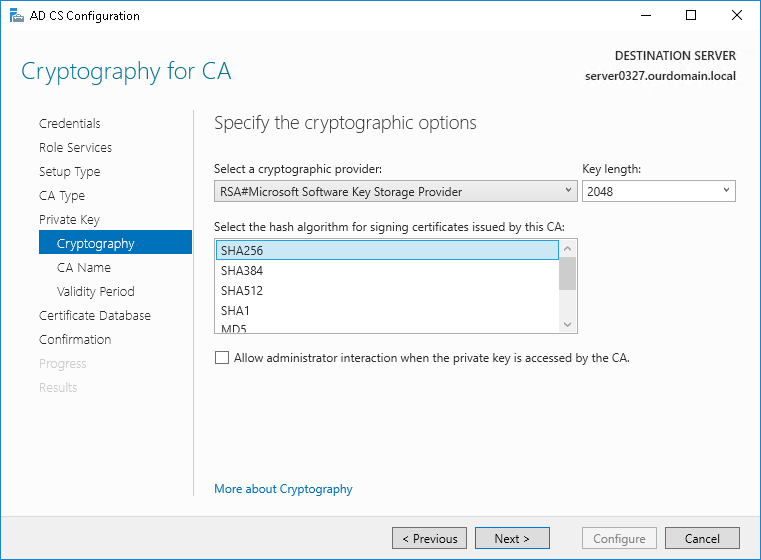
selecting cryptographic provider, key length and hash algorithm
- Enter the display name of the root certification authority and thus of the root certificate. Confirm with Next.
entering the name of the CA and of its root certificate
- Select a validity period for certificates to be issued. Confirm with Next.
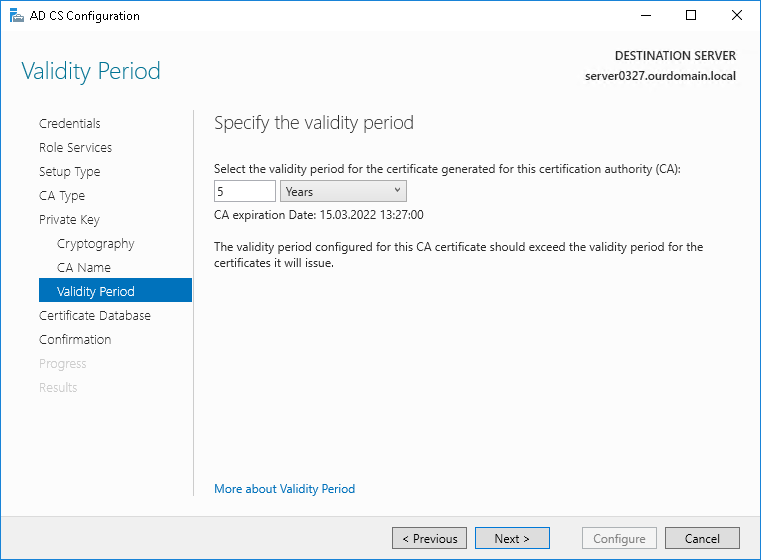
selecting a validity period for certificates
- Specify the directories for certificates to be issued as well as for the log files. Confirm with Next.
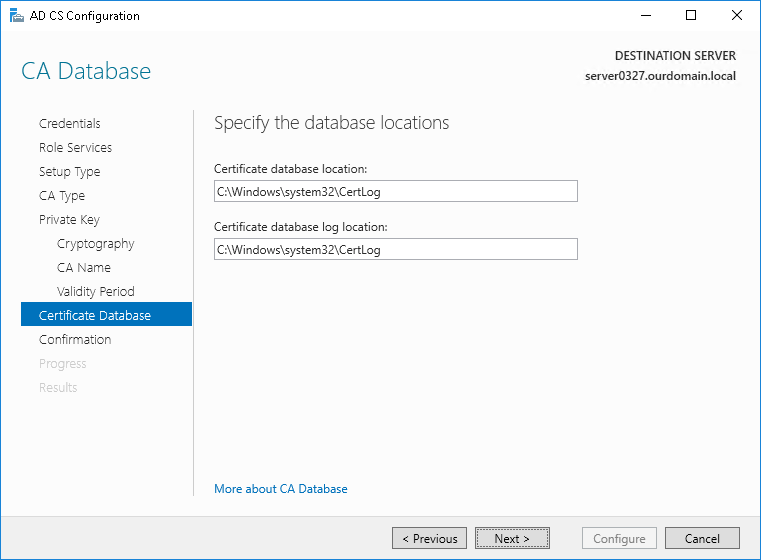
specifying directories for certificates and log files
- The configured options for the roll services are displayed. Select Configure to accept the configuration.
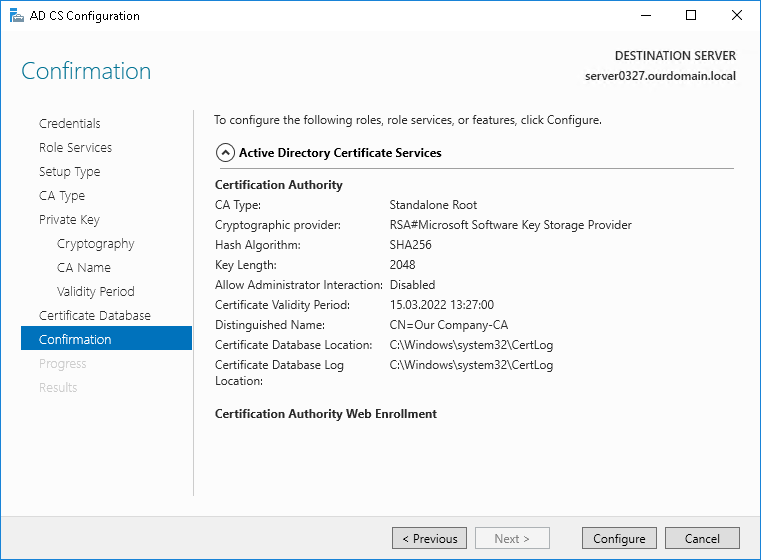
accepting the configuration
- The results of the roll services configuration appear. Select Close to finish the configuration.

configuration result
- Select Close to finish the installation.
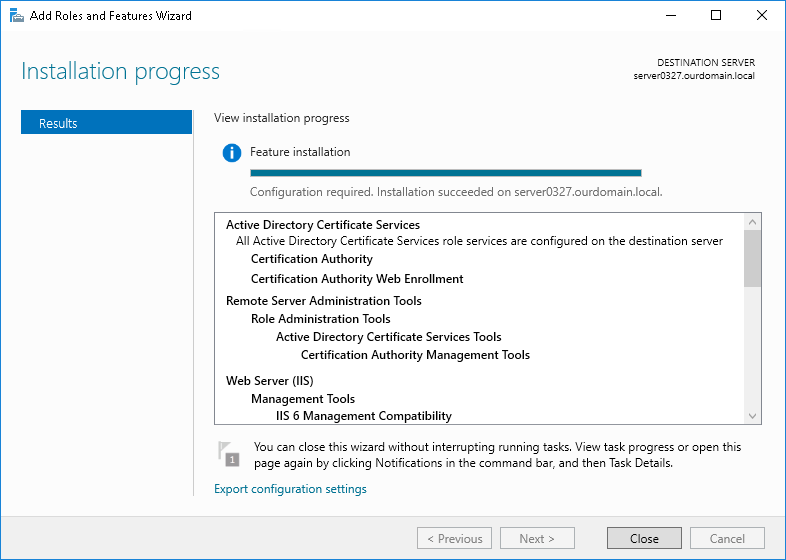
finishing the installation
You have now set up a root certification authority (CA) on your server. This means that client and server certificates can now be signed using the root certificate and then issued. The root certificate you have just generated can be found in the MMC in the certificate store. This can be exported from here and distributed to all central print servers.
newly generated root certificate in the local certificate store
The console of the certification authority that you set up in the first step can be found under Start → Administrative Tools→ Certification Authority.