If you want to print with encryption to a client computer, a certificate must be imported onto that computer and at least one entry needs to be made in the registry.
Before encrypted data is sent, the central print server remotely checks whether the client’s registry contains the entry CertName with the name of the imported certificate and also that the certificate is stored on the client. The CertName entry in the registry must – as described in the following – be carried out manually:
- After the certificate has been imported onto the client, make one of the following registry entries:
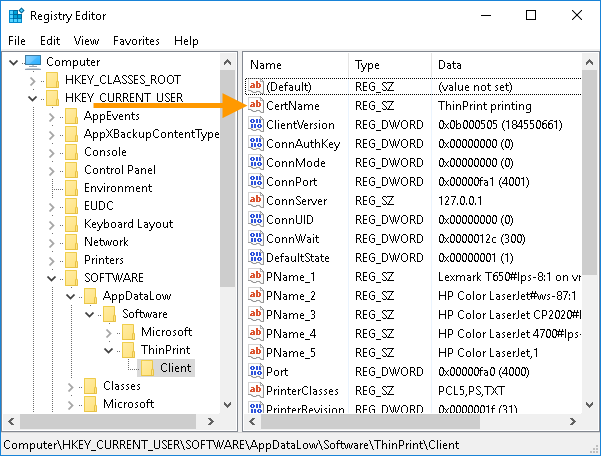
either per user:
hkey_current_user\software\appdatalow\software\thinprint\client\CertName [reg_sz]
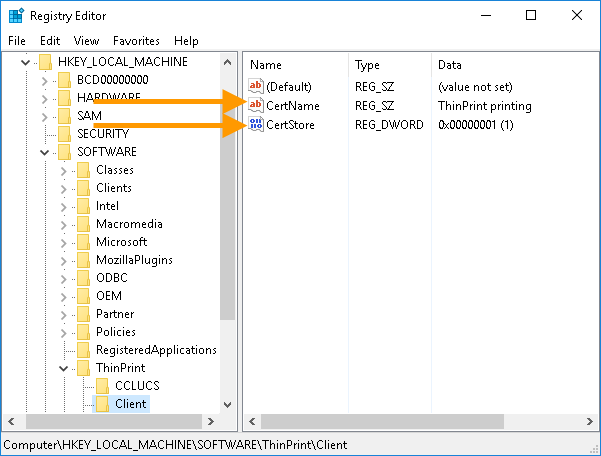
or computer-based:
hkey_local_machine\software\thinprint\client\CertName [reg_sz]

registry value for ThinPrint encryption on a Windows client (per user)

registry values for ThinPrint encryption on a Windows client (computer-based)
- As the value, enter the name of the imported certificate, which can be seen in the Issued to column in the certificate overview in the MMC.
- Finally, restart ThinPrint Client Windows (to do this when the client type is an application, terminate it and start it again. If it is a Windows service, restart the service).
The CertName registry entry is only required for encrypted print jobs; the passage of unencrypted print jobs is still possible.
Note! If you have placed your certificate in the computer’s certificate store (i. e. computer-based), you must set the registry value CertStore to “1”.