See also the sample scenario.
- Open the Management Center configuration console.
opening the Management Center console
- Click OK to confirm.
note that Management Center is not yet configured
- Specify the SQL server.
- Enter the (noted) name and user account for the Management Center’s database.
- Click OK to confirm.
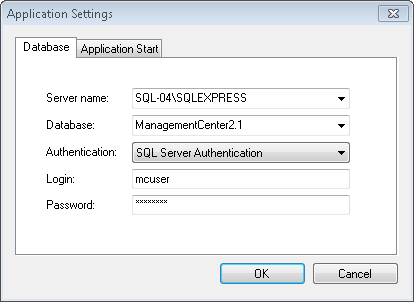
entering the database credentials
- Enable Extra→ View→ Show Comments in Treeview.
Management Center: enabling the view of comments
- Select Locations→ New.
Management Center: creating a new Location
- Enter a name of a branch office (here: Helsinki).
- Click Create to confirm. Click Close.
Management Center: entering a location name
- Select All ThinPrint Client Devices→ New.
Management Center: adding a ThinPrint Client
- Enter the local print server’s hostname (here: lps-8).
- Select the Location. Click Create to confirm.
Management Center: entering local print server’s address and selecting its Location
- Enter the workstation’s hostname (here: ws-87)
- Click Create to confirm. Click Close.
Management Center: entering workstation’s address and selecting its Location
- Select All ThinPrint Client Devices→ Get Configuration to retrieve the printer lists from the ThinPrint Clients.
Management Center: retrieving the printer lists from ThinPrint Clients
- Click OK to confirm.
Management Center: printer lists retrieved successfully
- The client printers will be shown.

Management Center: local print server’s printer list
- Select Central Print Servers→ New.
Management Center: adding a central print server (= target server)
- Enter the central print server’s hostname or the IP address (here: vmee-n0ps)
- Click Create to confirm. Click Close.
Management Center: entering the server address
- Select Connections→ New.
Management Center: creating a new Connection
- Enter any name for connection settings (here: HLSNK, maximum 5 characters with Windows 2008 R2 clusters)
- Select the Central Print Server.
- Select the Location.
- Click Create to confirm. Click Close.
Management Center: entering the Connection name and selecting both the central print server and the Location
- Select Connections→ HLSNK→ Edit Printers.
Management Center: opening the printer list of the new Connection
- Click Select All and then OK.
Management Center: edition the Connection’s printer list
Creating printers on the central print server
Now the just selected printers will be created on the central print server automatically.
- Select Central Print Servers→ vmee-n0ps→ Apply Configuration.
Management Center: applying the printers to the central print server (= creating the printer objects)
- Click Yes to confirm.
Management Center: confirming the message
- Click OK to confirm.

Management Center: printers created successfully
Result: Four printers have been created on the central print server (here: Lexmark and 3 HP).
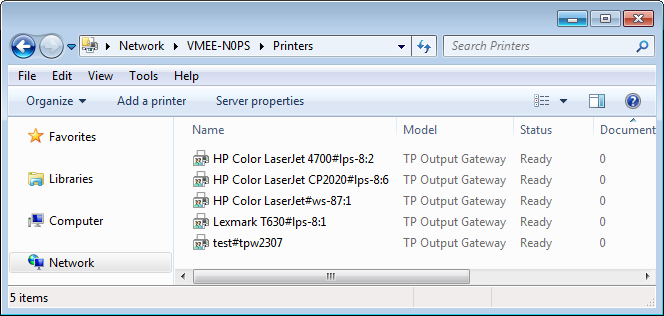
Printers folder on the central print server: created printers
Configuring AutoConnect
Now the printer information of the Management Center will be exported for AutoConnect’s Dynamic Printer Matrix.
- Select Central Print Servers→ Export to CSV.
Management Center: exporting printer information to an AutoConnect CSV file
- Specify a file name. Click Save to confirm.
Management Center: specifying the CSV file name
- Change to the Dynamic Printer Matrix on the Active Directory Server.
- Select Import Configuration (upper arrow).
- Select the .csv file and click Open to confirm.
Caution! An existing configuration will be overwritten.

AutoConnect GPO: importing the export file into the Dynamic Printer Matrix
- The new Dynamic Printer Matrix’s settings will appear. Click OK to confirm
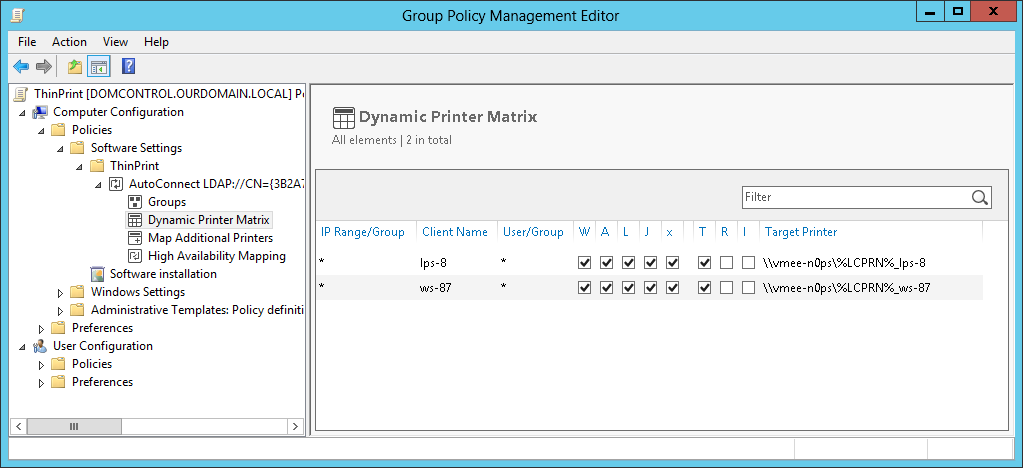
AutoConnect GPO: export file imported into the Dynamic Printer Matrix